Braising – a few thoughts and a recipe


A few more thoughts on braising:
- It can be done on the stove over medium to low heat, or in the oven at a moderate temperature (325 or 350).
- You can use any sort of liquid for braising, such as water, broth, or wine.
- Reducing the liquid is important step and is normally done by simmering it for a few minutes until it has reduced in volume. This will cook out the alcohol if you’re using wine and concentrate the flavor and thicken the liquid.
- Braised dishes also often taste better the next day, which is perfect for someone like me who often plans for leftovers.

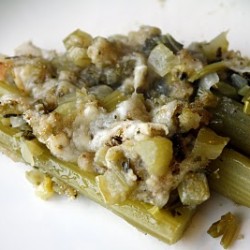
After taking the class, I was inspired to try out this new technique. I’d love to make braised meat sometime soon, but so far I haven’t had a spare 4 hours to wait for it to cook. I decided to start with a recipe provided in my handout – braised celery. The handout promised that this recipe would “transform ordinary celery into a delicious braised side dish that’s fantastic on a cold winter day,” and it was true! I never knew celery could taste this good. It’s braised in a combination of chicken stock and wine that’s been cooked down with some vegetables. The celery turned out to be tender and full of flavor. This would be an excellent “fancier” side dish. Even Mike liked it more than I expected and rated it a 3. That’s a pretty good rating for celery, and I can’t wait to try this technique on a roast!
Braised Celery with Bread Crumb Topping
Yield: Serves 4-6.
Ingredients:
3 Tbsp unsalted butter, at room temperature
1 large head celery
1 small yellow onion, finely minced
1 1/2 tsp finely chopped fresh thyme (I used 1/2 tsp dried thyme)
Salt and Pepper, to taste
1/4 cup dry white wine
1 cup chicken stock
1/4 cup grated gruyere cheese (I used mozzarella)
1/4 cup grated parmesan cheese
3-4 Tbsp bread crumbs
Directions:
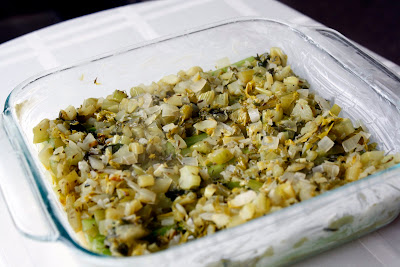
Preheat the oven to 325. Generously butter a large baking dish using about half the butter. Separate the outer celery stalks (8-10) from the shorter, paler, tender stalks (the heart). Set the heart aside. Thoroughly rinse the outer stalks. Trim off any part of each stalk that branches into leaves and set aside with the heart. Using a vegetable peeler, scrape the outside of each stalk to remove the fibrous strings that run its length. Cut the stalks into 3-inch lengths. Arrange them in a single layer in the baking sheet.
Finely chop the reserved celery heart, tops and leaves. In a pan over medium-high heat, melt the remaining butter. Add the onions, thyme, and chopped celery. Season with salt and pepper. Saute until the vegetables are soft and golden, about 10 minutes. Add the wine and stock and simmer until reduced by half, about 8 minutes.
Pour the mixture over the celery in the baking dish. Cover with aluminum foil and bake until the celery has collapsed and feels very tender when prodded with a fork, about 1 hour. Remove the baking dish and increase the oven temperature to 400. Sprinkle the cheese and bread crumbs over the celery. Return the dish to the oven and bake until the cheese is melted and the top is crusty and browned, about 10 minutes. Serve immediately.
from Williams Sonoma

 Welcome! I'm Megan and it's my hope that here you'll find food that has been made with love and recipes that are shared with joy. Thanks for stopping by!


wow I never really knew what it meant either – thanks for sharing! Sounds like a fun class!
Great info! I really wasn't sure what it meant either!
I love braising things. Ben is obsessed with soft meat, so I braise all year long!
We tend to keep celery in the fridge to add crunch to a dish, or to use as a base in soups. But this recipe lets celery be the star! We'll have to try this soon.
Braising…I would use this method but did not know that there is a name for this technique 🙂 Interesting with celery…looks yummie!
Thanks for sharing what you learned. Now I know what I do when I braise. I braise meat, quite often but usually do not name it, as braising.
looks awesome!
Have been braising meat for years, but never thought about braising in terms of veggies. Super recipe! Love that topping!
I have always wondered if WS's cooking classes are any good. I'm glad to hear you learned a lot from them. I've seen braised celery before, but never made it myself. I will have to try your recipe!
Apples and Butter – I love the WS cooking classes. I think it depends on the teacher though – I've had a few that weren't great, but at most of them I've learned a lot. I'm a newer cook though, so I feel like I never mastered a lot of the basics.
Megan, this loooks so good. I'd even eat it as my main dish. Yumm!
id like to be a better cook and a better writer, if only i was bold enough to take a class and if only i was creative enough to think of a synonym for bold.